Soil cracks and mounds, dead grass patches and holes on the ground – these are some of the most common tell-tale signs of mole infestation in your backyard. Moles are subterranean or underground mammals that feed mostly on grubs and insects.
They make intricate tunnels below the ground and prefer moist soil as their habitat. The tunnels they create have different rooms such as a kitchen and nursery and if they remain undisturbed in a particular location, they are likely to inhabit the area for years.
Moles do not stay in an area in numbers, in fact, they are considered loners. In a mole-infested area, you are lucky to find one mole in every two acres. They are only usually with another mole when the breeding season hits.
This is where the male mole makes way for a bigger chamber for its mate. This is also in anticipation of their offspring. Female moles usually give birth to three to four baby moles. It takes a little over a month before these mole pups are weaned, become independent, and ready to leave the nest.
Although moles do not pose direct harm to people, they can cause damage that costs thousands of dollars to your lawn, garden, and plants. Mole infestation can cause erosion in your yard which may even lead to accidents. Ultimately, the tunnels moles create can be inviting to more pests like rats, mice, weasels, and underground animals to access your home.
Moles feed mostly on grubs and earthworms but eradicating them does not seem to be a long-term solution to drive moles away from your area since they can feed on other insects.
The best-known remedy is to install mole-specific traps and we’ve got it covered for you. We are sharing a list of the best mole traps this 2020, how to install them, and why it is effective. Before you proceed, please make sure trapping is allowed in your State.
7 Best Mole Traps for 2020
1. Tomcat Mole Trap
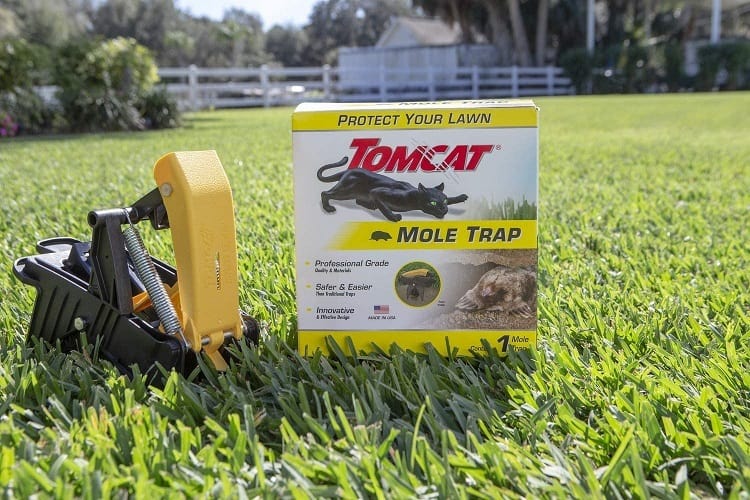
The Tomcat Mole Trap is one of the more advanced and better-designed mole traps in the market. It kills quickly without leaving a bloody mess on the catch. It needs to be set up on a location where a mole activity is confirmed through dirt volcanoes and tunnel trails.
Simply dig a hole that would fit the bottom of the trap. Slowly push it down using the foot pedal until it makes its way in and the catcher touches the bottom of the tunnel. Once it is completely set, the foot pedal will be locked.
The way it attracts the mole is simple. As light passes through the little hole in the trap and on the trigger, the mole will come near it and try to cover it with dirt. This natural reaction from the mole will activate the trigger trapping the mole between the claws on either side of the trap.
The claws will simply restrain the mole and the tight trap will eventually lead to suffocation and death. The trap will not poke any hole on the mole’s body and will ensure no-mess disposal.
Pros
- It is easy to use
- No-mess clean-up
- Effective
Cons
- Requires regular check-ups on the trap
- Might not be effective on really wet or muddy tunnels
Click here to check the price!
Bottom line:
The Tomcat Mole Trap is in between the trap that pokes a hole and leaves the mole bloody and a trap that lets you dispose of them alive. Perhaps this is less messy and complicated disposal than the other two.
It is easy to set up and use but the brand also warns about using it in lawns with really wet or muddy soil as it may interfere with the efficiency of the trap.
Made with professional-grade quality and materials, the Tomcat Mole Trap is safer and easier than traditional traps. Specially designed as hands-free, the mole trap is fast and easy to place and set. Effectively kills moles without drawing blood.
2. Sweeney’s Deadset Mole Trap
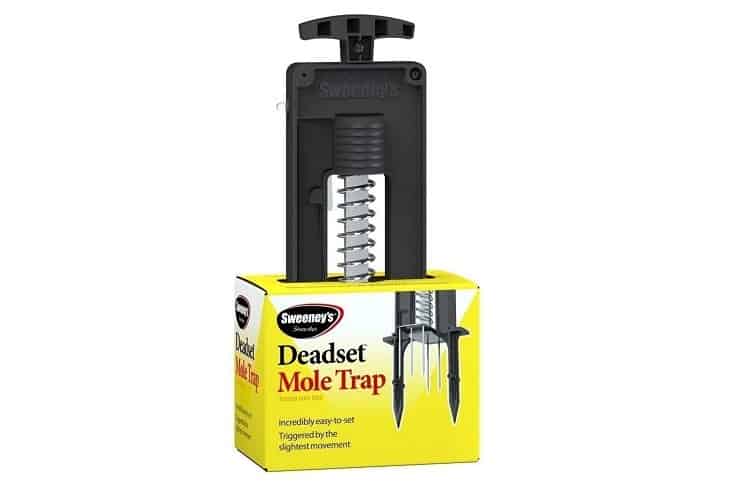
This mole trap is one of the earliest available mole traps in the market and is probably the easiest one to set up. Sweeney’s Deadset Mole Trap does not require any tools, but the brand suggests that the lawn should be moist for easy plunging of the device. https://seogel.com/istanbul-escort/
Once you have identified where the mole tunnels are, turn on your water sprinkler or water the lawn with the hose to soften the soil and let the mole trap penetrate easily. Drive the bottom of the trap in, step on the foot driver and plunge the trigger several times until it sets.
The mole will try to dig and build the disturbed tunnel and once the mole passes by the area where the trap is, the slightest movement will trigger the trap and punch the small spears to the mole.
Users will know that a mole is caught once the trigger is on the ground. It is also easy to release the mole with the built-in safety release device on the Sweeney’s Mole Trap. All you have to do is cover the dead mole with soil at the bottom of the tunnel after releasing the trap.
Pros
- It is easy to set-up and use
- No-mess clean-up
- Dissipates quickly
- Covers 5,000 sq. ft. of land quickly
- Can penetrate deep into mosquitoes’ hiding places
Cons
- Effective only on moist soil
- Requires regular check-ups on the trap
- Plastic parts might get worn out easily
Click here to check the price!
Bottom line:
Sweeney’s Deadset Mole Trap may be the easiest mole trap to set up. However, like most mole traps it will require pre-installation preparations that are crucial to making the trap work.
The trap is really sensitive once installed correctly and the spikes make a sure kill. The use of this product will require counter-checking existing laws covering traps in your State.
The Sweeney's Deadset Mole Trap is a quick and effective way to deal with moles digging their way through your yard. The depth tabs make it easy to set for the exact depth at which the moles are digging. Once set, the powerful spring will be triggered by the slightest movement.
3. Nash 100 Choker Loop Mole Trap
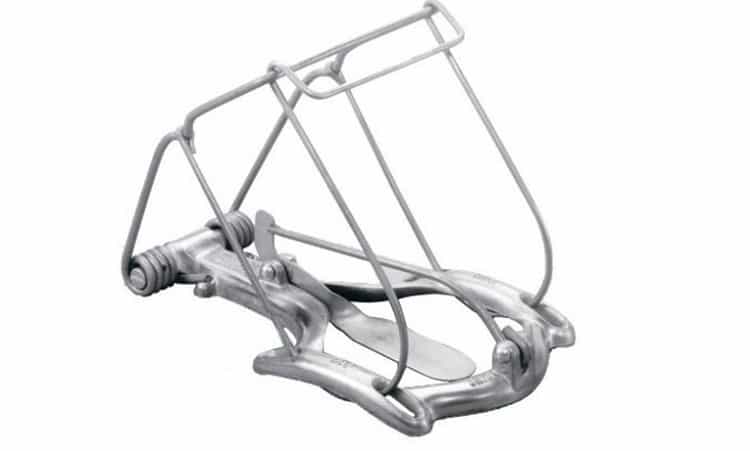
This mole trap does not have spikes yet still goes for the kill whenever a mole is trapped. It is a choker type trap that leaves the mole it catches breathless and lifeless but bloodless.
It is made with galvanized spring-steel construction and a recycled cast aluminum base. To set up the Nash 100 Choker Mole Trap, you will need to identify where the mole tunnels are, dig a hole using a spade shovel and a trowel for a more snug location for the mole trap.
Users have to make sure that the loop of the trap is facing the open end of the mole tunnel or runway; otherwise, it will not work.
Before covering the trap, moisten the soil surrounding the trap, stones, and debris must also be removed. Dampen the soil you will use to cover the trap as well.
Make sure to fill the areas surrounding the trap and the areas above it. Cover the rest of the area with loose soil and ensure there are no empty spaces for light to penetrate.
If the location where you placed the trap is within the active tunnel, it should be able to trap a mole within 24 to 48 hours. If that doesn’t work, move the trap to another location. Likewise, ensure that all the installation steps are followed.
Pros
- Durable trap
- Less surface disturbance on the trap
Cons
- Complicated setup
- Requires regular check-ups on the trap
Click here to check the price!
Bottom line:
Despite its good built and quality, the durability aspect may be overpowered by its complicated setup. For mole trap beginners, needing two to three tools, the need to secure the trap onto the ground can be time-consuming and might end up with too much disturbance on the mole tunnel.
This may lead the mole to refrain from getting near the trap. The great thing about this trap is that it is not susceptible to surface disturbance. You can keep the trap underground without the need to reinforce the setup.
Easy setup & operation. Safe near children & pets. Galvanized all spring steel construction with cast aluminum base.
4. Cinch Mole Trap with Tunnel Marking Flag
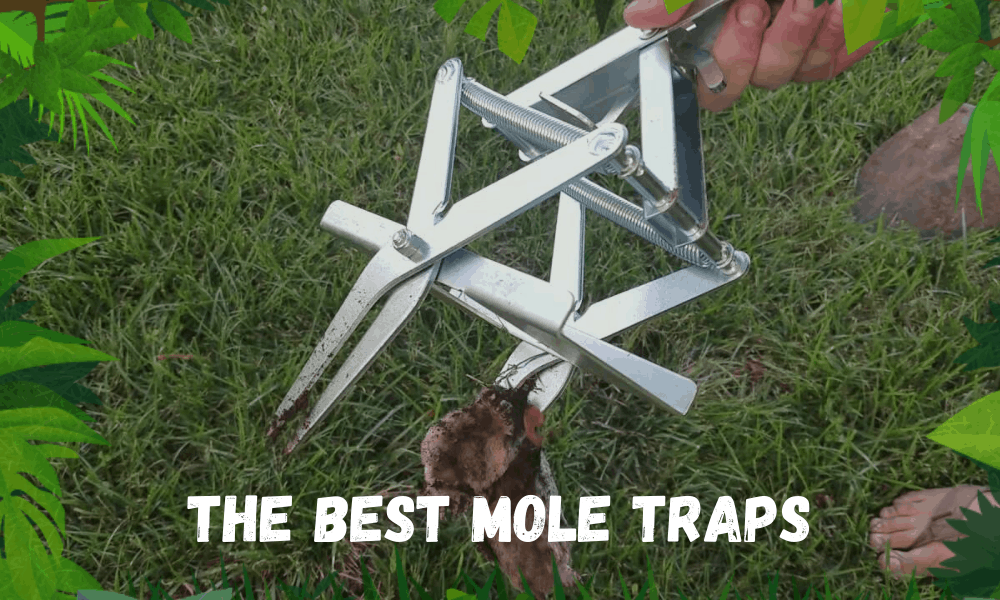
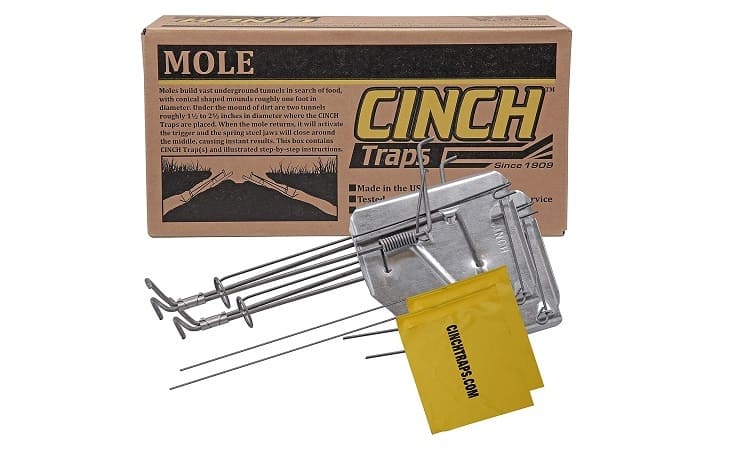
The Cinch Mole Trap brand is not only made for moles but for other pests and rodents that may inflict the same damage to your home and garden. Gophers, rats, and moles will not escape this trap and will suffocate because the system works by capturing the pest and immediately enclosing steel jaws in the middle. This mechanism will lock the mole in place and suffocate or choke it.
The trap has a built-in marking flag making it easy to locate and check a few days after installation. It is made with heavy-duty galvanized steel that can be reused and will not rust even after several uses. This trap also makes it easy for users to dispose of the trapped pest by simply releasing the trap and burying the pest on the ground or disposing of it directly via the garbage bin.
Cinch Mole has been making this trap since 1909 and is approved by the US Forest Service. The easiest way to install this mole trap is to locate active tunnels. It is best if you can find an uncovered hole as well where you can directly place a fully-setup Cinch Mole Trap.
Pros
- Heavy-duty and reusable
- No-mess clean-up
Cons
- Trap setup needs a thorough understanding of the manual
Click here to check the price!
Bottom line:
More than 100 years of mole trap manufacturing experience is an impressive track record to start with. The system is old but gold. Younger home-owners may not be keen on the kind of setup that this trap requires but it is definitely worth a try.
Protect your lawn and garden from destructive moles with an easy-to-use cinch trap designed to eliminate them for good.
5. Easy Set Mole Eliminator Trap
“Easy Set” that is probably all there is to say about this mole eliminator trap. The concept and setup are easy to understand, and that makes it really appealing even for new users. In fact, 95 percent of its users say it is effective, and setup will take less than 5 minutes.
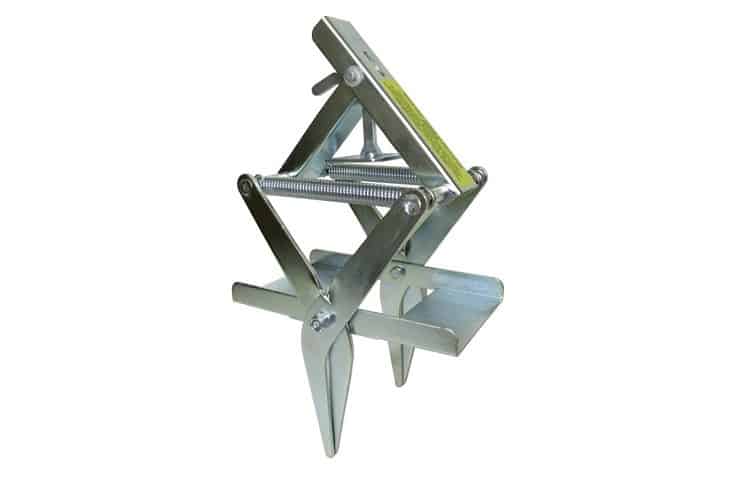
The brand’s claim that it is the easiest setting mole trap in the market is true. Simply press the trap down onto the center of an identified active mole runway until the bottom is settled on a solid part of the ground – which is also the bottom of the tunnel. To activate the trap, step on the foot pedal until it is parallel to the ground.
Once the Easy Set Mole Trap is triggered underground, it will capture the mole and the foot pedal will turn up and will alert the user that a mole has been trapped. To check the trap, simply pull it out from the ground. Once a mole has been caught, users can simply lift the release lever and properly dispose of the mole.
The Easy Set Mole Trap is made with durable steel, it does not require baits and is safe to use in an environment with pets and kids.
Pros
- Easy setup
- Heavy-duty and reusable
- No-mess clean-up
Cons
- Handling needs extra caution due to sharp parts
Click here to check the price!
Bottom line:
With just two simple steps to follow, nothing really is easier to use than this mole trap. It is nicely built and is effective. Like any other mole trap, this one will only work in tunnels where mole activity is present and confirmed, and when it is installed correctly.
The mole eliminator is made of heavy gauge steel then electroplated for rugged use and long service life. It is ready to use out of the box with no bair required and no holes to dig.
6. NoMol Mole Trap
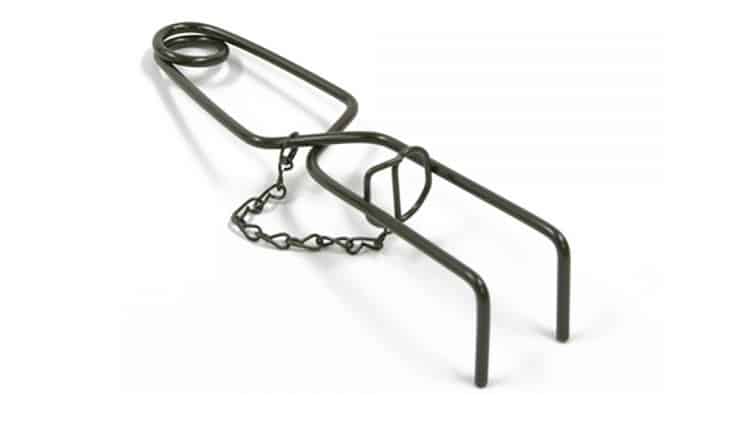
Each set of NoMol Mole Trap comes with four (4) traps and four (4) wooden stakes. It is made with plated steel that will guarantee that it will remain rust-free for years. It is a slim type trap that looks like twisted tongs. It will not require digging tools to make way for it and will not create too much disturbance on the mole’s tunnel system.
To set up the trap, simply create a small opening on the active mole runway. Squeeze the trap and place the trap ring in between the opening. Carefully lay it on the tunnel’s opening and secure using the wooden stakes before burying it on the ground.
Unlike other traps, no specific way or indicator would signal whether the trap caught a mole aside from digging it from the ground to inspect it.
Pros
- Easy setup
- Plated for rust-proofing
- No-mess clean-up
Cons
- The trap is sensitive that it might be triggered even as you set it up
- No indicator that a mole has been caught
Click here to check the price!
Bottom line:
NoMol Mole Trap creates very little disturbance caused by digging during setup. However, it is very sensitive which may either be good and/or bad at the same time.
The trap ring must be appropriately placed to avoid unintentional trigger during setup. It can be further improved if there was a way to tell from above the ground that a mole was caught.
NoMol traps are the most effective mole traps on the market. The trap is completely safe as it is placed below the ground to catch unwanted moles, voles and shrews. They are easy to set up and prevent unwanted pests from damaging backyards and gardens.
7. H&B Luxuries Trap
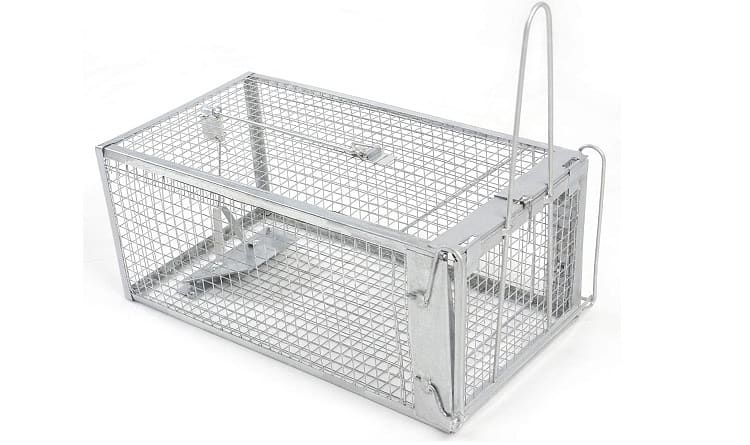
The H&B Luxuries Trap is an old school and proven way to trap rodents, marsupials, and pests. It is guaranteed to be escape-proof, with its spring-triggered door mechanism with latch. It is placed above ground and is a proactive way to catch exploring moles at night. It is not only built for moles, but its size can also capture squirrels and chipmunks.
It is made with galvanized wire mesh steel and heavy-duty steel frames for guaranteed durability and resistance from corrosion. Another great thing about this trap is that the animal it catches does not die and can be turned over to animal rescue centers for proper handling. The solid door ensures that you can transport the mole or other animals without any hassle.
Pros
- Catches moles and other pests
- Can be placed above the ground
- No escape
- No animal deaths
Cons
- Cannot be placed in the tunnel line
Click here to check the price!
Bottom line:
This classic pest trap is one of the most familiar ways in catching rats, moles, and similar animals. Although it cannot be placed underground like other mole traps, it can still get the job done by trapping wandering moles above the ground. It is also a more ethical way of catching these pests and lets you turn them over to the animal centers which can handle them.
This product has evolved through the years to become the most successful mechanism to catch small animals. Ideal for catching voles, squirrels, mice, rats, weasels, birds, opossums, lizards, rabbits, and chipmunks.
How to Setup a Mole Trap
1. Locating Active Tunnels
Locate the active tunnels by looking for active runways where the soil is pushed up. Punch a hole on these runways and place markings on top of it. Come back after 24 hours. If the holes have closed up, this means there is a mole activity. This area is the perfect location for your mole trap.
2. Setting up the Trap
Using a shovel, trowel or lawn edger, dig a hole in the identified trap location. Carefully place the trap to avoid disturbing the tunnel structure. Set the trap and activate the trigger, if available. It is very important to carefully follow the instructions that come with your trap as there might be a unique trigger point for every brand.
3. Checking the Trap
Check the trap every 12 to 24 hours, if possible. Do this especially if your trap is meant to kill the trapped mole as the clean-up will be more difficult if it stays on the trap for days.
If your trap simply catches, you might want to release the mole in a cage and bring it to an animal rescue center in your area.
Conclusion
Animals and humans can coexist until animals become a threat to human’s habitat and necessities – that is when they become pests. Moles may seem harmless, but the damage they bring about to properties can cost homeowners thousands of dollars to restore and rehabilitate.
With these mole trap options, homeowners can now find which works best for them and what manner of trapping is the most acceptable as well. Mole traps do not cost much too, and they mostly work the same way. Users have to make sure to follow the instructions carefully to make the most out of this tool and guarantee its efficiency.

